
I have a serious addiction that I've mentioned before. Paper. Anything paper. So much so that this weekend I opened a drawer to grab a thank you card and found my drawers overflowing. For some women it's shoes or bags, for me it's paper. Cocktail napkins, tissue paper, gift bags, gift tags, wrapping paper, place cards, the list goes on and on. I find myself always checking out the "sale" shelves at Tarjay, Hallmark, the Paperie, Papyrus, etc. and always snatching anything that is cute and a good deal, needed or not. My thought process when buying paper: it doesn't expire, doesn't go bad, and rarely goes out of style! The hubs just shakes his head. I think my addiction started as a child when my mother would pay me to wrap beautiful presents. A few Christmas seasons I even had my own little "business", wrapping presents for neighbors. So I guess my hubby can thank my mama.
For me, it's all about the presentation. It's as important as what's inside the box. I love making people feel special and to see them smile at the sight of a beautifully wrapped gift.
For me, it's all about the presentation. It's as important as what's inside the box. I love making people feel special and to see them smile at the sight of a beautifully wrapped gift.
Here are some of my favorite stores and boutiques for all things paper.
The Stationery Studio
- love it because there's always a sale going on


The Stationery Studio
- love it because there's always a sale going on

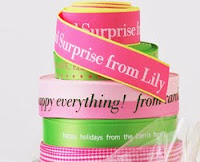
- love them for their personalized gift wrap and ribbon

My go to for these adorable notecards and personalized napkins

These in blush pink are a staple. Timeless, classic and super affordable ($35). Awesome gifts!


Great for showers & hostess gifts!

One of my favorite places to buy cards. Cards are always buy 3 get 1 free. {Target stores also carry a small selection of their cards.}
This place is heaven for lots of reasons, not just gift wrap. My go to for holiday wrapping.

And if you live in a shoebox, like I do, this store will be your best friend for maximizing space, hello Elfa!
LOVE their gift wrap! They have some really cute burlap, pink and green pieces right now in addition to super cute baby gift wrap.


I stocked up on the red & green houndstooth a couple of Christmases ago and use it year round.
And since I live in a shoe box, I'll dream about beautiful spaces to house my paper addiction until the day comes when I have space.


What are your favorite places to shop for stationery?!?!
Hope your Wednesday is fabulous!
cBv


